Labyrinth

From The Twilight Forest Wiki
Jump to navigation Jump to search
Labyrinth
Labyrinth - Boss Gate.png
Biome Twilight Swamp
Consists of Mazestone
Oak Fence
Water
Lava
Gravel
Mushroom Blocks
Mushrooms
Iron Bars
Chest
Tripwire
Tripwire Hook
TNT
Boss Minoshroom
Map Icon Labyrinth Icon.png
ID twilightforest:labyrinth

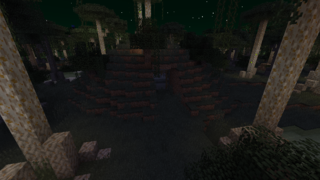
Sunk deep into the earth beneath the Twilight Swamp are the shadowy, twisting Labyrinths. These vast underground mazes are a good challenge for a seasoned explorer, with winding corridors seemingly without end, dead-ends and scuttling monsters lurking in the dark, but also many treasures to reward those who conquer the labyrinth.

Features[edit]

Explorers have found these underground lairs to be built in two levels, each a complex maze of which no two is the same. Access into the top level can always be gained with a small shaft that has been built into a hill, not unlike a small Hollow Hill. Sometimes though, the passage of time has caused seismic shifts in the land, causing ravines and caves to break into the top level of the maze. The second level of the maze, unfortunately, has only been found to be accessible via a similar shaft that connects the two levels. Attempts to break directly from the top level to the bottom level have all ended in failure, as a nigh-invulnerable rock surrounds the bottom.

The entire complex is constructed of Mazestone, a extremely hard material that makes breaking through the maze a time-consuming and tiring process. Although mainly formed into bricks for the walls, it also can be found with subtle mosaic patterns on the floor or with a smooth, drab surface in the ceiling. Wooden arches and Iron Bars are the most common decorations found throughout the maze. Torches can be found occasionally, but given the sheer scale and complexity of the labyrinth, adventurers are advised strongly to bring their own source of light lest they get hopelessly lost.

As mentioned above, no two labyrinths are the same, but there are common features to be found within, as described below.

Torch Room[edit]


An arched dead-end containing torches. Some only contain two torches, while others have every available space covered in them.

Fountain[edit]


Another dead end containing a fountain of water or occasionally, lava a couple of spaces across.

Large Room[edit]


A large room with entrances in the cardinal directions. Sometimes these have a large pool of water in the centre, while others are caved in with gravel. More importantly, every maze has been found to have one of these rooms with a shaft ringed with iron bars, providing access from the top level maze to the bottom.

Iron Gate[edit]


Rarely found in the mazes, these iron gates completely bar the way down a corridor. At least the iron bars aren't as tough as the Mazestone walls...

Treasure Nook[edit]


Adventurers can bank on finding several of these on both levels of the labyrinth, with a double chest sitting on a pedestal just beyond another iron gate. Caution is advised when attempting to loot these chests, as some have found them to be trapped with trip hooks to TNT explosives, which can be frustrating, if not deadly to the careless.

Minotaur Lair[edit]


Although Minotaurs are common throughout the entire labyrinth, they seem to congregate in these large chambers. Consisting of four large pillars containing chests, but also one magical spawner near the corners, these rooms can be challenging as the bull creatures swarm over invaders. Destroying the magical spawner is recommended before proceeding to loot the chests. The chests themselves may also be trapped much like the treasure rooms elsewhere in the maze, so caution is also advised.

Mushroom Nook[edit]


Found in dead ends on the second level, but also sometimes infesting a small part of the corridor are large mushrooms of the same species as their giant cousins on the surface. Mycelium can also be found on the floor, having replaced the ubiquitous Mazestone.

Secret Vault[edit]


Indicated by a grey square on the Maze Map, it is composed of four double chests, each alongside four wooden pressure plate above four TNT. The secret vault has no opening, so the best way to break in is to blow up some TNT found elsewhere in the labyrinth near the walls, until the chests are visible. Then, remove the wooden pressure plates and loot the room.

Minoshroom Prison[edit]


This large, mushroom infested chamber is the Minoshroom's lair and can only be found on the second level. Why it is barred with fence posts is a curiosity often forgotten when the snarling Minoshroom paws at the entrances, seeking only to bury its wickedly sharp axe into those who would challenge it.

Monsters[edit]

Minotaurs are the signature creatures to be found in the Labyrinth, but they do share the twisting corridors with others, whether willingly or not is a question better left unanswered. Scuttling Fire Beetles, Slime Beetles and Pinch Beetles have been found, with Cave Spiders also making their home in the darkness, though thankfully not to the same extent as in mineshafts in the Overworld. Also unique to the Labyrinth are Maze Slimes. These amorphous cubes seem to be identical to their green Swamp cousins, other than their odd brick-like appearance, and while they can overwhelm an ill-prepared adventurer by sheer weight of numbers, they may be a welcome adversary as they can contain a valuable Charm of Keeping, as well as a handy supply of Slime Balls.

Treasure[edit]

The many chests hidden in the maze have been found to contain all manner of wondrous prizes. The dead end treasure rooms often include Maze Wafers, Blaze Rods, Ironwood Ingots, and occasionally Golden Apples and Steeleaf. The Minotaur Lairs can have even more useful equipment, such as Iron Ingots, Steeleaf, Potions and Ironwood Ingots, as well as full Ironwood Armor and Steeleaf Armor. These chests can also contain the essential Maze Map Focus, which can be used to create a Maze Map, a major boon to any explorer wishing to navigate the maze.

Secret Vault[edit]

It is rumored that there are even more fabulous prizes to be found. These treasures are said to lie within a secret vault that only those who hold a Maze Map will be able to find. The second level of a Labyrinth will contain a secret room that contains very valuable treasures such as the unique Mazebreaker, Emeralds, some Steeleaf, some Ironwood Ingots, and occasionally an Ender Chest to stash these treasures in safely. Those lucky explorers who have found the vault have also reported finding highly enchanted armor, tools, and weapons within these chests. Vault rooms are hidden by several layers of Mazestone and will have four large chests in the center. The four large chests will be heavily guarded by 16 wooden pressure plates which are resting on TNT. Sand will be resting on Mazestone that is above the wooden pressure plates, preventing easy entrance from the top. Entrance from the bottom is also difficult due to the bedrock floor. Great care should be taken when entering the secret room so as to not blow up the valuable loot. Although the best way to access the vault safely is to mine down to the bedrock layer, mine a hole large enough for you to stand in the direction of the vault. Place a trapdoor down so that you can crawl below the pressure plates, and then proceed to mine all of the TNT. Once that is done, you may safely access all of the loot with no risk of explosion.

Progression[edit]

Those who first enter the Twilight Swamp will find the entire area plagued by clouds of mosquitoes, inflicting a wasting hunger on anyone attempting to trek further in. Pushing onwards to the Labyrinth entrance is of no use as the maze will be protected by the same force field that protects the Lich Towers. Only by killing a Twilight Lich and taking its scepter will the mosquito curse be dispelled, as well as removing the shield over the Labyrinth.

Defeating the Minoshroom and consuming some of the Meef Stroganoff that it carries will remove the protections on the Fire Swamp and allow access to the monstrous Hydra.

Image Reel[edit]

  • The entrance and exit
  • The gateway between the layers of the Labyrinth
  • The second floor is even darker than the first
  • A common meeting ground for all of the Minotaurs
  • A room created by the Minoshroom's influence
  • Without any support, the Labyrinth can collapse in on itself.
  • Even the Minotaurs need a nice bath.
  • An Iron Gateway to keep the mobs at bay.
  • An Archway to hold up the Labyrinth.
  • A dead end infested by the Minoshroom's influence.
  • A dead end filled with various Roots and Root Strands.
  • A dead end filled with a small shower of water.
  • A dead end filled with a small, hot, lava shower.
  • A dead end filled with 2 Torches.
  • A dead end filled with 40 Torches.
  • A rare room with some valuables. Be careful for traps!
  • A typical wall, made of several variants of Mazestone
  • An odd wall, full of unchanging Mazestone
  • The Minoshroom Attacks!
  • History[edit]

    Version Details
    1.11.11 Added Labyrinth.
    1.12.0 Added a small well entrance to the Labyrinth.

    Treasure rooms now have Torches.

    1.12.3 Put a hill on top of the entrance, just to make things nicer.
    1.15.2 Disabled mob spawning in the Labyrinth vault.
    2.3.5 Fixed Labyrinths generating a few blocks higher than usual.


    Biomes and Landmarks
    Biomes Dark Forest Dark Forest Center Dense Mushroom Forest Dense Twilight Forest Enchanted Forest Final Plateau Fire Swamp Firefly Forest Glacier Mushroom Forest Oak Savannah Snowy Forest Spooky Forest Thornlands Twilight Clearing Twilight Forest Twilight Highlands Twilight Lake Twilight Stream Twilight Swamp
    Progression Landmarks Naga Courtyard Lich Tower Labyrinth Hydra Lair Goblin Knight Stronghold Dark Tower Yeti Cave Aurora Palace Troll Caves Cloud Cottage Final Castle
    Other Landmarks Caves Hedge Maze Hollow Hill Magic Trees Mushroom Castle Quest Grove Twilight Forest Trees